Hello Bloggers, I hope you all doing well. In this article, we will learn how to insert a working contact form in AMP Blogger with Google forms, AMP Forms, and some CSS. This tutorial is beginner-friendly so you don’t need to worry about AMP elements and CSS at all.
I found lots of articles providing indirect methods like using amp-iframe and embedding pages. You can even embed a Google form directly with the use of amp-iframe but you have to bear the Google credits below it and mainly, it’s badly slow comparing to our normal contact form.
In this tutorial, we will be using the same Google form but without iframe, we will be utilizing the amp-form elements to create a perfect contact form. You can see the demo before going to the article.
Due to the latest update in google form, some users have reported my earlier tutorial was not working properly, and I found there are a couple of changes in codes so, I have updated the tutorial based on the latest structure with some bot protection measures.
Table of Contents
How to Add Contact Form in AMP Blogger
First of all, make sure that you have amp-form installed or configured in your AMP theme, most of them would have it, but do check or else the contact form would never work.
If amp-form is not present in your theme paste this code inside the <head> and </head> tag or along with the similar amp tags
<script async='async' custom-element='amp-form' src='https://cdn.ampproject.org/v0/amp-form-0.1.js'/> This is to insert the AMP form components and scripts into your website.
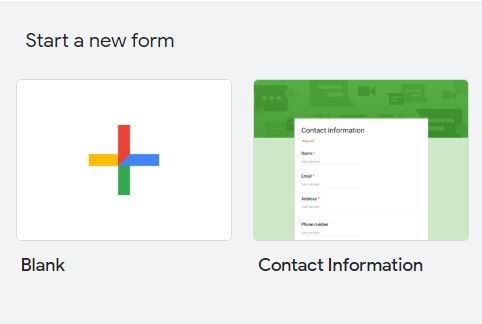
1. Go to Google Forms and from the top section click the “Contact Information” template which will make our work easy.
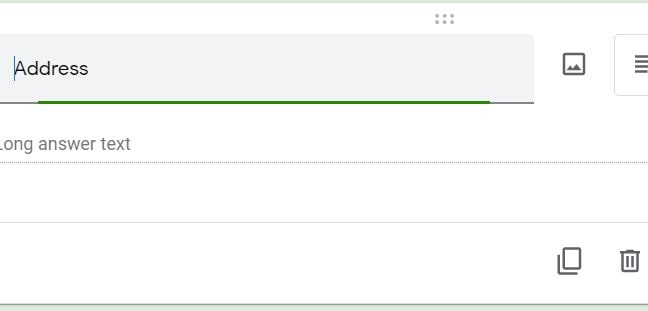
2. In the template you can see different blocks for Name, Email, Address etc. Delete all the blocks except Name, Email and Comments. You can select each block by just clicking on it.
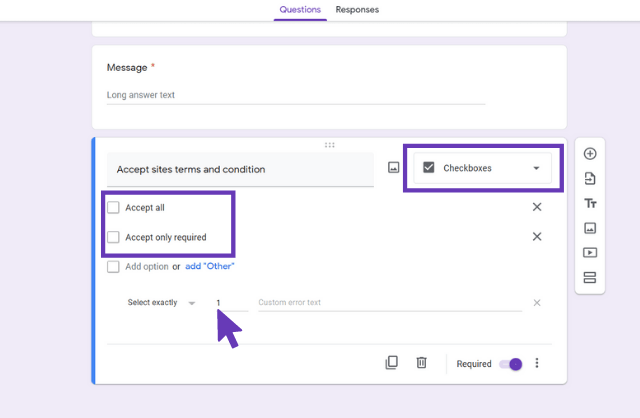
3. For avoiding bots we can add an extra field with some checkboxes, for that add a checkbox field by clicking the + icon and fill some questions and options according to your wish
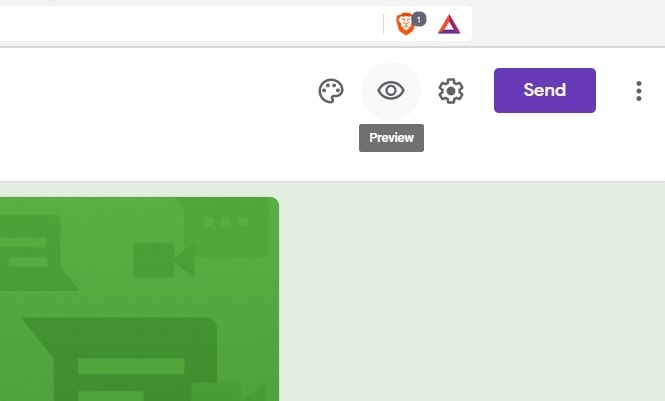
3. After that click Preview button in the top
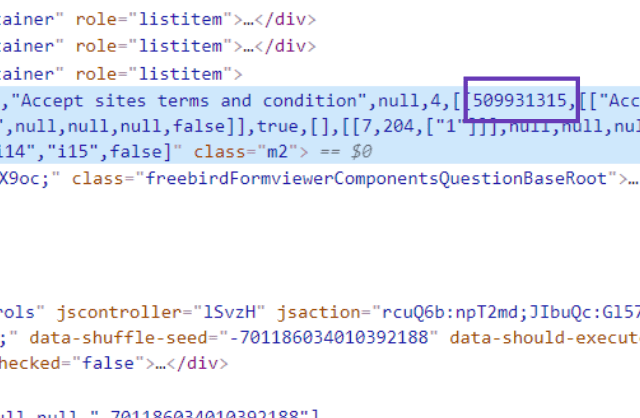
4. From their right click on the answer field of Name and select Inspect. Copy the second numbers that I have marked in the picture.
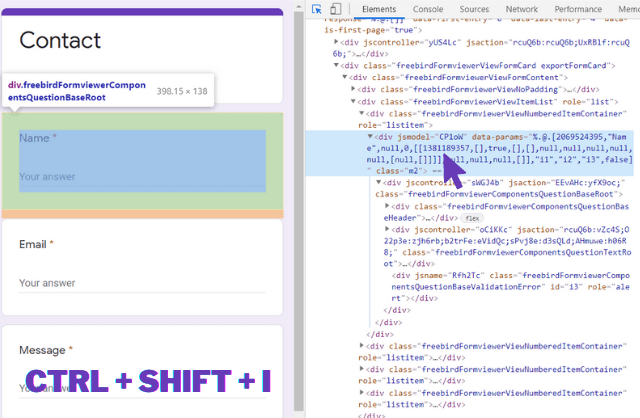
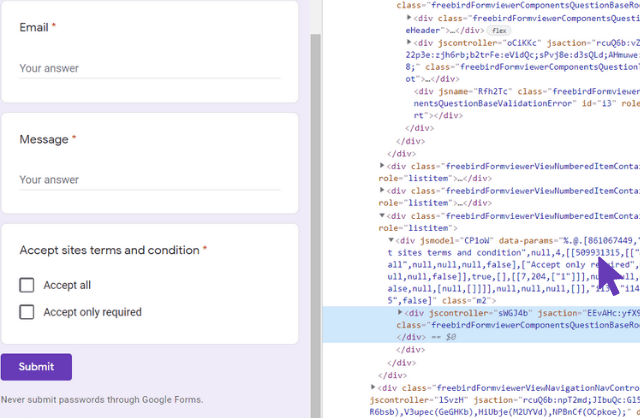
5. You can see a highlighted HTML code below and in that, you can see a <div jsmodel> where you will get the entry values Repeat the same method for Email and Comments and checkboxes.
6. If you go up in the code you can see an element <form action="Some URL">. Copy that URL too
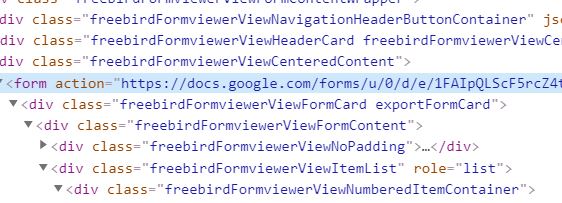
6. Now you have got an ID for each field and URL, Replace these fields from the below code and remember the ID should be matching with the label. Paste the ID you have copied for the corresponding filed and paste the URL in the above field. Note that ID is the same for all option in chechboxes
<div class="msgform">
<form action-xhr="//docs.google.com/forms/u/0/d/e/xxxxx/formResponse" method="post" target="_top">
    <label>Your Name</label>
    <input name="entry.xxxxx" required="" type="text" />

    <label>Your Email</label>
    <input name="entry.xxxxx" required="" type="email" />

    <label>Message</label>
    <textarea cols="45" name="entry.xxxxx" required="" rows="8"></textarea>

    <label>Accept site terms and conditions</label>
    <p><label><input name="entry.xxxxx" value="Accept all" type="checkbox" />Accept all</label></p>
    <p><label><input name="entry.xxxxx" value="Accept only required" type="checkbox" />Accept only required</label></p>

    <input type="submit" value="Submit" />

    <div class="alert" submitting="">
     Please Wait...
   </div>
    <div class="alert" submit-error="">
     Success!
   </div>
    <div class="alert" submit-success="">
     Oops Please Try Again!
   </div>
  </form>
</div>
7. Paste the above HTML code in your contact page by switching to HTML mode in post editor.
8. Paste the below CSS inside the <style amp-custom='amp-custom> tag and Save the theme.
/* AMP Contact Form by MFK Bloginos */
.msgform input[type=text],input[type=email],textarea{width:100%;padding:12px;border:1px solid #ccc;border-radius:4px;box-sizing:border-box;margin-top:6px;margin-bottom:16px;resize:vertical}.msgform input[type=submit]{background-color:#297CA4;color:#fff;padding:12px 20px;border:none;border-radius:4px;cursor:pointer}.msgform input[type=submit]:hover{background-color:#222}.alert{background:linear-gradient(to right,#e24747,#f39d9da6);margin:20px 0;padding:0 10px;color:#fff;border-radius:3px;}
9. If you have done everything correctly your contact form should be working from now on!
Modifying the Contact Form
You can add your own CSS to modify the form and add custom error, submitting, and success messages in the HTML code. To replace you can simply edit the text inside the corresponding tags given below.
| Type | Tag |
|---|---|
| Submitting Message | <div class="alert" submitting=""> |
| Success Message | <div class="alert" submit-error=""> |
| Error Message | <div class="alert" submit-success=""> |
Benefits of AMP Contact Form in Blogger
In this particular contact form, you can easily collect email address and store it in an Excel sheet which is already present in the Google forms and exploit other addons features provided by Google.
You can later use these emails for content marketing or other marketing purposes. Creating a wonderful opportunity for collecting emails which are not available in ordinary forms.
It’s difficult to distinguish between our contact form and the original contact form in the blogger. You can view our previous post where we have discussed best amp blogger templates.
Conclusion
I hope that this article on the contact form in AMP Blogger has helped you to insert a working contact form in your AMP blog. If you have any doubts regarding this article, comment below with your questions and we are happy to help you.